In Japan, the national holidays of Shunbun no Hi (Vernal Equinox Day) and Shubun no Hi (Autumnal Equinox Day) occur in March and September, respectively. Both are central days of the biannual, week-long Japanese Buddhist holidays known as higan, an equinoctial celebration that traces its tradition back to the Heian Period (794-1185).
This year’s autumnal higan starts Sept. 20 and ends Sept. 26.
In Japan, where many culinary practices are linked to the seasons, it’s not surprising that a special sweet is enjoyed during higan. For the vernal or spring equinox (haru no higan), plump sticky rice sweets go by the name of botamochi because they are thought to resemble the botan (peonies) that are in bloom. In autumn, the same sweets are called o-hagi (clover) because of their resemblance to the plant’s flowers.
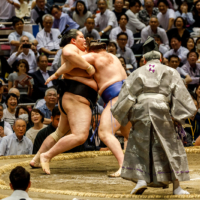
O-hagi sweets are often displayed on family altars before being consumed. This practice of osonae (ritualistic offering) enables households to show respect to their ancestors while “sharing” the holiday with them.
The sweets come in many shapes and flavors, too. The recipe below offers three varieties of o-hagi to enjoy this time of year. All are made from a combination of lightly pounded uruchimai (ordinary short-grain rice) and mochigome (glutinous rice). The spherical rice balls are filled with tsubuan, a chunky, fudge-like adzuki bean paste. In turn, these are covered in kinako (toasted soy flour), crushed black sesame or a fresh green soybean mash called zunda.
Autumn o-hagi sweets
Makes 18 portions (three o-hagi varieties of six pieces each)
- 1½ cups uruchimai
- 1 cup mochigome
- 1 teaspoon sugar
- ¼ teaspoon salt
- 500 milliliters water
- 200 grams tsubuan (chunky sweet red bean paste), divided into 18 portions, each rolled into a small ball
Black sesame coating
- 3 tablespoons kuro surigoma (toasted and crushed black sesame seeds)
- 3 tablespoons sugar
- 1 scant teaspoon salt
Kinako coating
- 3 tablespoons kinako
- 3 tablespoons sugar
- 1 scant teaspoon salt
Zunda coating
- 3 tablespoons water
- 1 tablespoon sugar
- 120 grams shelled, boiled edamame beans
- Pinch of salt
Place the uruchimai in a bowl and cover the grains with cold water. Stir vigorously to wash the rice clear of excess starch, then strain and repeat with fresh, cold water several times until the rinse water runs clear. Drain well and mix with the mochigome (no need to wash this kind of rice).
Place the rice mixture in the bowl of an electric rice cooker. Stir in 1 teaspoon of sugar and ¼ teaspoon salt to 500 milliliters of water and add this flavored water to the rice. Allow the rice to sit in the water for 10 minutes before you start its cooking process. Once the rice has finished cooking, allow it to sit undisturbed for about 10 minutes.
Alternatively, you can cook the rice over a stove. Add the rice mixture and the 500 milliliters of seasoned water into a straight-side pot with a tight-fitting lid. Let the rice sit for five minutes to allow the kernels to absorb some of the water.
Cook the rice over high heat until the liquid begins to bubble vigorously (about seven or eight minutes). Lower the heat to maintain a gentle boil and continue to cook until all the liquid has been absorbed (about 10 to 12 minutes). You may hear a dry, hissing sound, but don’t let the rice scorch. If you must peek inside to check the rice's progress, do so quickly and immediately replace the lid. Once the rice is cooked, remove the pot from the stove, covered, and let it sit undisturbed for 10 minutes.
While it is still hot, pound the cooked rice to a mash in which bits of rice are still visible. Use a wooden shamoji paddle, surikogi pestle or rolling pin to accomplish this. Divide the pounded rice into 18 portions (each about 2 tablespoons).
Cover a large tray (about 35 centimeters by 25 centimeters) with cooking parchment and set it aside. Prepare a piece of plastic wrap that measures about 15 cm square. Place a single portion of rice onto the plastic wrap. With fingers or a shamoji dipped in water (to keep the rice from sticking), gradually spread the rice to nearly fill the space. Place one ball of tsubuan in the center of the rice and bring the edges of the wrap up and over to enclose it. Twist slightly while pulling down to shape the tsubuan-filled rice into a ball. Once shaped, remove the wrap and set aside the ball on the parchment-lined tray. Repeat the steps to make all 18 balls.
Prepare your coatings. Place the kuro surigoma in a small, lidded storage container (about 300 ml volume) with the sugar and salt. Place the lid on top and shake to distribute the sugar and salt evenly. Similarly, place the kinako and its sugar and salt components in a different lidded container, and shake to mix.
To make the zunda coating, add the water and sugar to a small saucepan. Place the saucepan over low heat and stir until the sugar is completely dissolved. Add a pinch of salt (to mellow the sweetness) and stir again.
Place the cooked beans in the bowl of a food processor and pulse-process until they are well minced. Between pulses, scrape down the sides of the bowl to ensure that all the beans are being crushed evenly. Add the sugar syrup and pulse-process until the mixture is smooth.
Take a tsubuan-filled rice ball and roll it in the black sesame mixture until the entire surface is covered. Repeat five more times to make a total of six black sesame o-hagi sweets. Place these on a parchment-lined tray.
Repeat the step above to make the tsubuan-filled rice balls covered in kinako mixture. Place the six portions on a parchment-lined tray.
Prepare a piece of plastic wrap that measures about 15 cm square. Take some of the zunda mixture and spread it to nearly cover the surface of the wrap. Place one tsubuan-filled rice ball in the center of the zunda coating and bring the edges of the wrap up to cover. Twist slightly while pulling down to shape the zunda-covered sweet into a ball. Once shaped, remove the wrap and set it aside on a parchment-lined tray. Repeat five more times to make six zunda sweets.
O-hagi are best served at room temperature within a few hours of making them. But if you need to hold the sweets before serving, cover them with clear plastic wrap to keep them from drying out. If it’s a warm day or you plan to serve the sweets the following day, refrigerate them and bring them back to room temperature before serving. O-hagi do not freeze well and should be eaten within 36 hours of preparing them.
With your current subscription plan you can comment on stories. However, before writing your first comment, please create a display name in the Profile section of your subscriber account page.